|
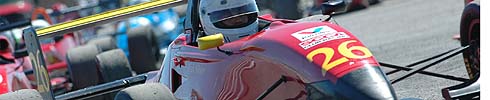
Driver: Paul Dana
Car: U.S. F2000 Zetec Championship Van Diemen-Ford (John Walko Racing)
Date: July 25, 2002
Through the local race team John Walko Racing I was recently given the opportunity to test at the new BeaveRun Motorsports Complex north of Pittsburgh. The circuit features some neat elevation changes, including a few blind-entry corners, and a decent mix of fast and medium-speed corners, all packed into a quick 1.6-miles.
When we tested in late July the circuit was just a few weeks old, so it was still extremely dusty and slick. The curbing was not installed yet so I can't give you many reference points. The ground crews were working hard to finish the curbing, smooth runoff areas and plant grass, so the dust situation will be resolved in short order. And as more cars run and a groove develops I'm sure lap times will come down. We lapped in the 56-57-second range immediately, with a best time of 55.97 in fewer than 25 laps. With proper gearing, some rubber down and some time to fiddle with the setup we expect to see times fall to the 52-53 second range for the pro F2000 cars.
Turn 1:
A second-gear, left-hand, almost 90-degree corner (74 degrees to be exact) after the pit straight. You approach at about 130 mph. There's a crest in the middle of the braking zone so the approach is blind. In the F2000 car you can leave your braking late enough that you are up on the crest as you start to brake, but it's tricky and your brake bias better be right or the car will get light on the way down the hill. Heavier cars will start braking before the crest. Once you clear the hill you can see your apex. Float as much speed as possible across the apex because you don't have much of an exit run. Minimum speed here is about 76-77 mph. Exit to about mid track and bend the car into Turn 2:
Turns 2-3:
These two quick right-handers blend together in an arc on the way to Turn 4. We were stretching second gear through both. Turn 2 is extremely quick and is almost flat out. Car placement on the way out of Turn 1 is critical so that you can continue to accelerate hard through Turn 2. People first learning the track will tend to want to make this more of a corner than it is. Try to go through flat and if the car gives up at the apex, just breathe slightly or steer to correct and let the car run wide on the exit. The track is extremely wide so there's plenty of room. The F2000 car has so much grip that we weren't using the entire track between 2 and 3, just coming out about mid-track before bending the car back in through Turn 3, which is flat-out.
Turn 4:
Another right-hander, not quite 90 degrees so it's fairly fast. This corner comes up on you extremely quickly so you have to be looking ahead through the whole 2-3-4 complex. It's kind of a rhythm section. The F2000 car hits about 104 mph on the approach. Straighten the car just long enough to brake gently, leaving the car in second gear, and float as much entry speed here as you can get away with. For us that was about 75 mph on entry.
Turn 5:
A short straight leads up to the 90-degree right-hander Turn 5, and you just touch 90 mph before you brake, leaving the car in second gear. This starts the roller-coaster section of the track, where a good rhythm and proper timing are critical. I'll call this the Uphill because it is similar to the Uphill at Lime Rock in that the track surface is flat on the entry and mid-corner, then steeply uphill on the exit. Like at Lime Rock, you can float quite a lot of speed into the corner (about 78 mph) because the hill will compress the car a create tons of grip on the exit. Let the car run free to about mid-track at the exit and set up for the left-hand Turn 6:
Turn 6:
This is a blind left-hand kink, with an uphill approach and an apex and exit that disappear over the crest, so you commit to it blind. In the F2000 car this corner is easily flat-out, but it takes a few laps of trial and error to get the turn in point right. It's earlier than you think. At the top of the hill exit to about mid-track and almost immediately bend the car into the downhill Turn 7. A short-shift to third gear is a good idea at this point so you don't have to deal with it in the middle of Turn 7, especially with a slick track.
Turn 7:
The coolest corner on the track, Turn 7 is a quick right-hand kink that falls off the backside of the hill you just climbed through Turns 5 and 6. The apex is blind so you turn in on faith, similar to Corner 2 at Mosport although it's not as fast. Turn in earlier than you think is right, and when you clear the crest your apex will be there to meet you. If you wait until you see the apex to turn in you are far too late. This corner was flat-out in the F2000 car because the track is so wide that there is plenty of room on the exit.
Turns 8-9:
These are just bends in the back straight. Given the track width both will be easily flat-out for most cars.
Turn 10:
The pro F2000 car reached about 135 mph at the end of the back straight. Once you clear the Turn 9 kink you straighten the car, brake late and hard and go down through the gearbox to first gear to get a good shot up the hill. This right-hand hairpin is actually quite quick. Again, like Turn 5, it is uphill on the exit so it will support quite a lot of entry speed. It is similar to Toe at Watkins Glen. Entry speed is quite high -- almost 60 mph in the F2000 car. Novice drivers will want to make this turn a double-apex but it is not necessary. The track opens up gradually all the way out so apex early and immediately start letting the car unwind. Radius equals speed, and the quick way out of this corner is all the way around the outside.
Turn 12:
This is another kink leading onto the pit straight. It, too, is blind over a crest, but it is easily flat-out.
|